EN
EN

How to create a second account on iPhone

Apple devices, such as iPhones, are extremely popular due to their numerous advantages. To fully utilize the device, it is necessary to create an Apple ID. This unique identifier provides access to various services and stores within the Apple ecosystem, including the App Store, iCloud, iMessage, FaceTime, iTunes Store, and many others. Additionally, it enables features like locating a lost device and other useful options.
Can You Create a Second Account on an iPhone?
Let’s start by examining Apple’s official stance on this matter. According to Apple’s terms of use, it is permissible to have two accounts on an iPhone, even on the same device. However, it is essential to comply with the rules. A large number of accounts may be flagged by security algorithms as bot activity, which can lead to account suspension or other restrictions.
If you decide to create two accounts on an iPhone, only one Apple ID can be set as the primary identifier on the device. This primary account is linked to iMessage, FaceTime, iCloud, and App Store purchases. Additional Apple IDs can be added for other services and functions, such as separate accounts for Mail, Contacts, Calendar, Notes, and certain apps.
Why Create a Second Account on an iPhone?
There are several common reasons why users may want to create a second account on their iPhone:
- Separating Personal and Work Life
One account is used for personal purposes, while the second profile is designated for work-related communication. This separation is convenient for managing different aspects of life. - Family Sharing
Family Sharing allows up to six accounts to be grouped into a "Family" for shared subscriptions to services. Each family member must have their own Apple ID. - Regional Restrictions
A second account may be necessary when certain features are unavailable in your country. It is also useful when relocating, as it provides access to content from multiple regions. - Different Purposes
Some users create additional Apple IDs to separate operations, such as one for iCloud and another for purchases.
Often, the need arises due to account bans or restrictions. If issues occur with the primary profile, adding a second account on an iPhone can restore access to services. A second account also enhances privacy and flexibility in using Apple services.
How to Create a Second Account on an iPhone
As mentioned earlier, the operating system allows for multiple accounts. Follow these steps to create a second account:
- Open Settings > Accounts & Passwords.
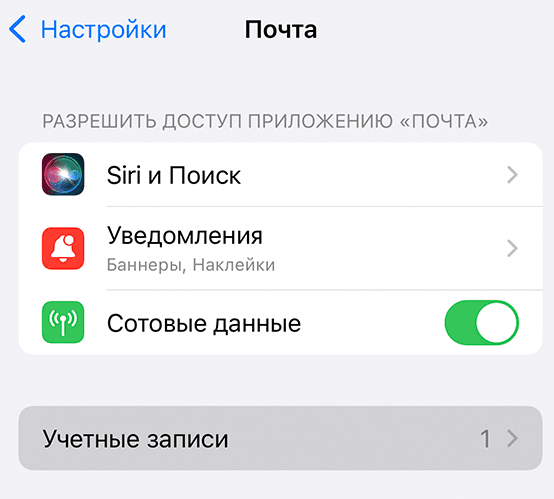
- Tap Add Account at the bottom of the account list.
- Select Apple ID from the list of available account types.
- Tap Add Existing Apple ID.
Enter the email address (Apple ID) and password for the additional account you wish to add.
Follow the on-screen instructions to complete the login process.
After successfully logging in, choose which data (Mail, Contacts, Calendars, etc.) you want to sync with this new profile.
Having two accounts on one iPhone allows for easy switching between them using the appropriate apps. Next, let’s explore how to register an account using a virtual number.
Creating Multiple Accounts on an iPhone Using a Virtual Number
When creating a profile, the system offers several verification methods. The simplest involves using a mobile phone. A virtual number ensures complete anonymity and convenience during registration. Follow these steps to purchase a virtual number:
- Register on the SMSBOWER Website
The service offers multiple registration options. A personal profile is required for purchases and receiving SMS verification codes.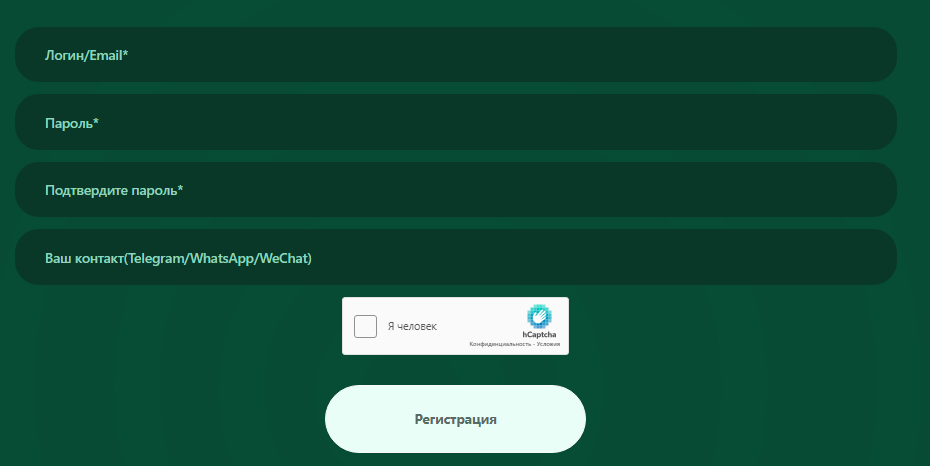
- Top Up Your Account
All purchases are made from your personal account on the website. Add funds using one of the available methods (credit card, electronic payment system, or cryptocurrency wallet).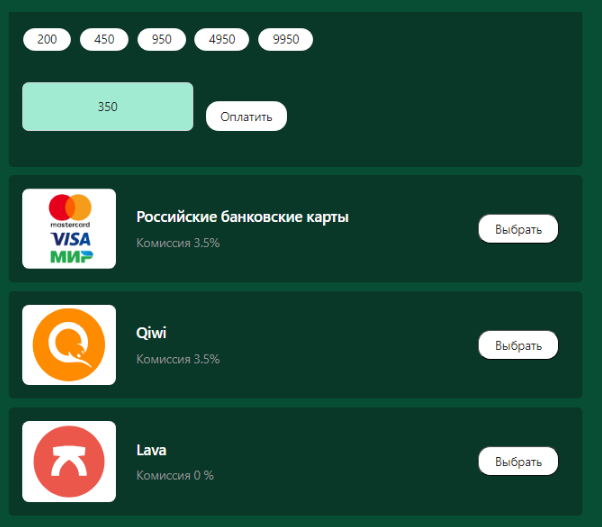
- Purchase a Virtual Number
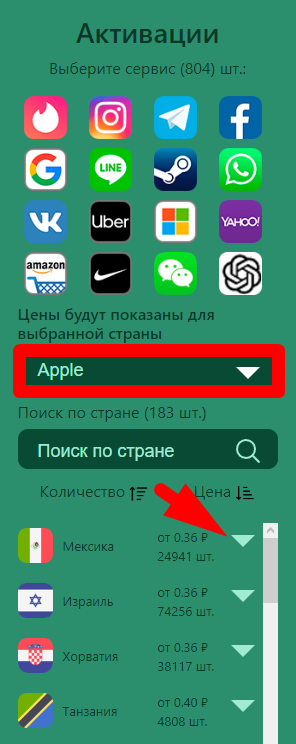
- In the first field, select the service "Apple."
- In the second field, choose the country.
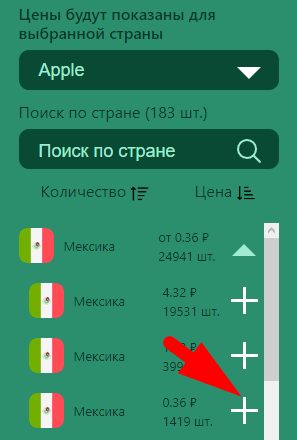
You can search by name or part of the name in the relevant field. Results can be sorted by the number of available numbers or price. Click the triangle icon to view the price list.
- Click "+" to Purchase
- Access the "Activation History" Section
This section stores the virtual number and allows you to retrieve the verification code.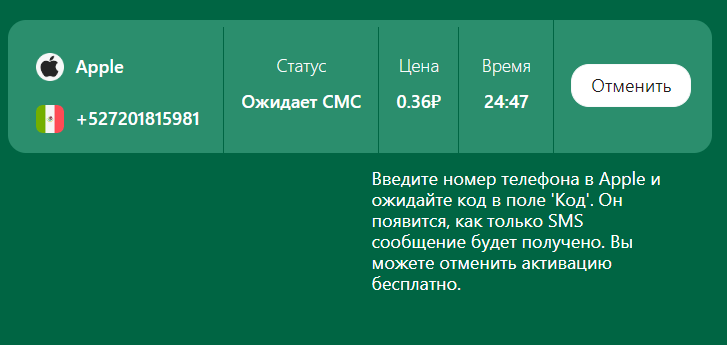
Now proceed to create the second account on your iPhone. Start by navigating to the general section and selecting the appropriate option.

Follow the on-screen instructions provided by the device. Enter your email address. When prompted to enter a mobile phone number, use the previously purchased virtual number. The access code will appear in the "Activation History" section on the SMSBOWER website.
This method allows you to create multiple accounts on an iPhone. There are no limits to the number of accounts, and the functionality remains unrestricted.
Popular Articles